
Mold Under the Sink: Find the Leak, Clean It, and Know When to Replace the Cabinet
If the leak is fixed and the mold covers a small patch you can reach on solid cabinet material, clean it and let it dry fully. If the board is swollen or crumbling, moisture keeps returning, or you suspect hidden damage, repair or replace the part, or call a professional. Test the plumbing again before you refill the cabinet. Painted walls and baseboards next to the cabinet get their own check in mold on painted walls and baseboards.
Stop the Water and Decide Whether This Is a DIY Job
A damp cabinet floor can look like a cleaning problem until you notice a drip running down the back of a pipe. Stop the water first. If a fitting keeps leaking, scrubbing the dark patches only means another soaking.
Stop using the affected fixture. If you can shut off the water supply without touching damaged plumbing or electrical equipment, do it. If you cannot control the leak or it threatens electrical equipment, leave the fixture off and call for help.
The EPA’s household mold cleanup guidance says you can usually handle an area smaller than about 10 square feet, roughly 3 feet by 3 feet, without professional remediation. Contaminated water, heavy water damage, hidden growth or hazardous work make even a small area unsuitable for DIY cleanup. The CDC advises people with mold allergies, asthma, COPD, immune suppression or other underlying lung disease not to take part in mold cleanup.
- Call a plumber if you cannot find or safely repair the plumbing source.
- Call a mold remediation company if the material is hidden, extensive, contaminated by unsafe water, or unsafe for you to handle.
- Ask a cabinet professional to assess deteriorated parts once the water and contamination are dealt with.
A damaged cabinet bottom can be replaced without replacing the entire kitchen cabinet.
Find the Leak Even If the Pipes Look Dry
A pipe can be dry during an afternoon inspection and drip after the next dishwasher cycle. Where the water shows up depends on which stage of sink use causes it, and each stage points to different connections. If the leak is not at the sink, the location map helps you place it.
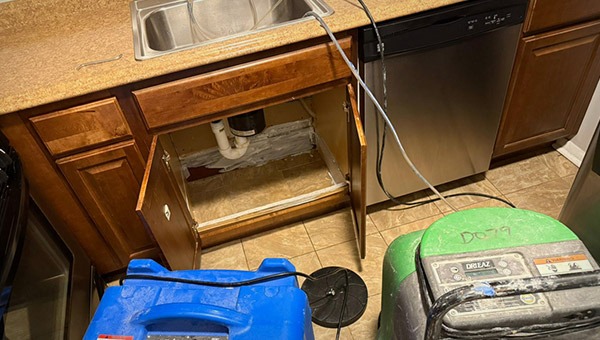
Clear enough space to see the fittings without disturbing suspect growth. Place dry newspaper or paper under likely drip points so new drops stand out from old dampness. If the cabinet is saturated or running the fixture could worsen the leak, leave it off and get an inspection. After a leak that soaked the cabinet, plan safe cleanup after a leak or flood.
| When water appears | What to examine | Why that condition matters |
|---|---|---|
| While the sink is unused | Shutoff valves, supply lines, faucet connections | Supply parts are under pressure, so they can leak nonstop. |
| During or just after faucet use | Pull-out or sprayer hose, under-deck connections, sink rim or counter seam | Water escapes only while the faucet runs or the area gets splashed. |
| While a filled basin holds water | Drain flange, basin and seals | A wet mark before draining points to the drain flange or basin seals. |
| When the basin drains | P-trap (the curved pipe under the sink), drain joints, disposal discharge | Wastewater passes through these fittings as it drains. |
| While the dishwasher or disposal runs | Dishwasher hose, disposal inlet or drain connections | Some leaks happen only when an appliance moves water. Water at the bottom of a disposal may have dripped from a mounting assembly or connection above it. |
| No water during one test | Intermittent connections, filtration fittings, hoses and neighboring seams | Leave dry paper in place for a few days to catch occasional drips. |
Moen’s kitchen-faucet troubleshooting treats continuous leaks and leaks after faucet use as separate problems, and hose and connector positions vary by faucet. For disposals, InSinkErator’s leak-tracing instructions say to watch the paper with the sink filled, while it drains, and while the equipment runs.

InSinkErator also names water filters, faucet sprayers, dishwasher hoses and countertop seams as possible sources when the disposal and obvious pipe joints are dry.
Dear Internet people.
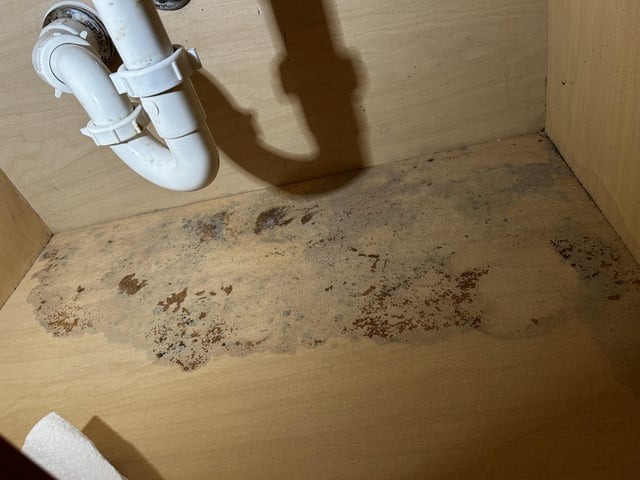
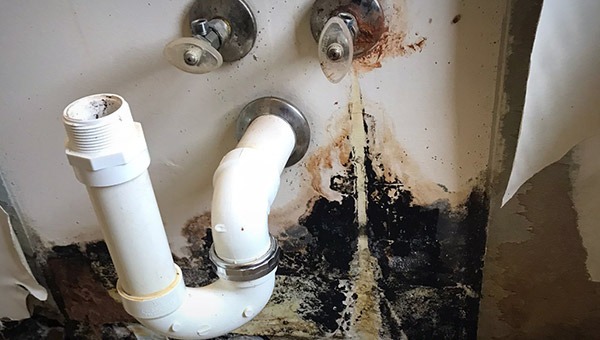
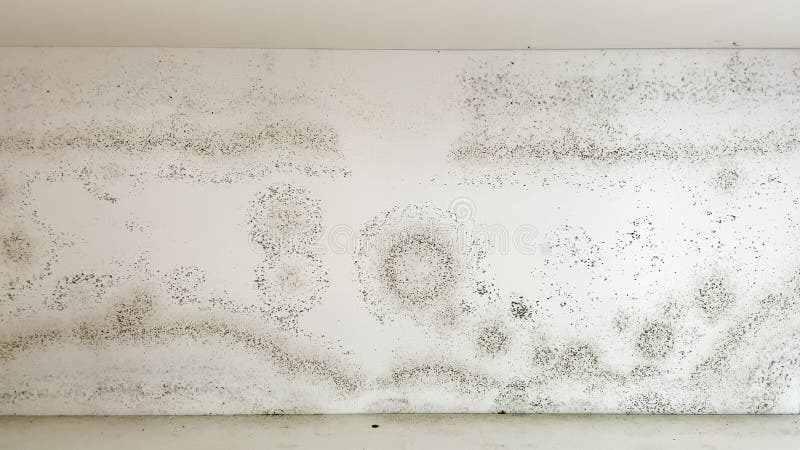
I went to replace my trash can liner. Found water under my kitchen sink, on a silicone liner and this black colored mold on the back wall/ cabinet bottom surface. Under & behind the liner. This mold was dry and sooty.
The second image is after my husband sprayed it with distilled white vinegar.
The dishwasher had leaked a couple months ago, we fixed the leak and we were going to replace it over Thanksgiving. We aren’t sure yet where this current water is leaking from – but it seems to be from above the cabinet. I hope it’s not all rotten under the surface!
How scary is this? Will I need to replace all / much of the cabinetry?? Are there simple tests for whether this is the dangerous type of mold?
Who do we call in for this? Handyman or plumber?
New homeowners here, just been here a few months. Gulp.
Thank you.
A removable liner can hide where water has collected. If you cannot find the source, have a plumber investigate the plumbing and assess the cabinet separately. If a musty smell gets stronger while the dishwasher runs, check the dishwasher connections.
Does the same investigation work under a bathroom sink?
Yes. Check the faucet supply, shutoff valves, sink seals and drain. A vanity without a disposal or dishwasher needs no appliance tests.
Is That Black Mark Mold or an Old Stain?
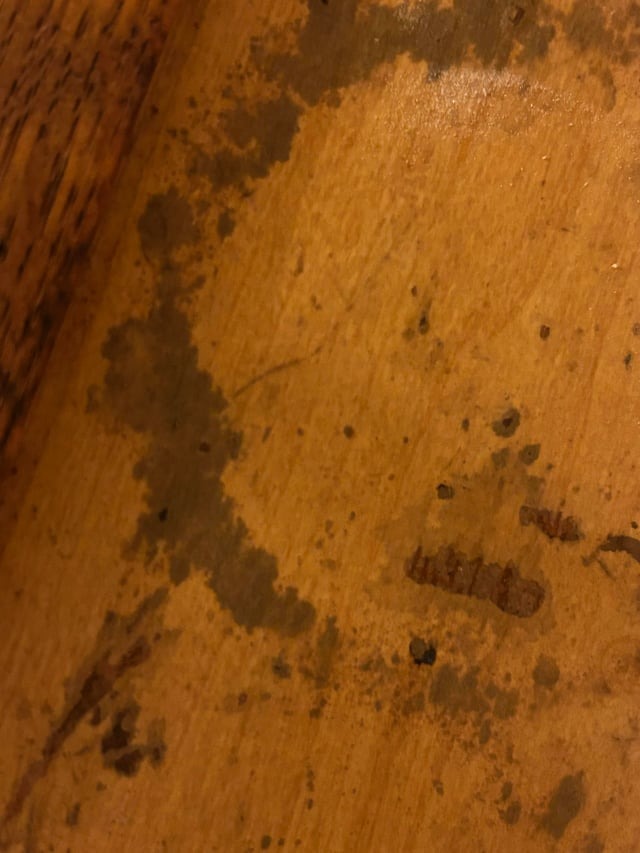
Black spots, a flat water ring and a musty smell are three different signs. Color alone cannot identify a mold species or tell you how dangerous it is. The EPA notes that cosmetic staining can remain after mold cleanup, so a persistent mark does not mean fresh growth. Check for dampness, new growth and softness, and see whether the discoloration sits on the finished face or beneath the laminate. If visible mold needs cleanup, the EPA generally sees no need for routine species testing to decide that.
Can You Clean the Cabinet or Replace Part of It?
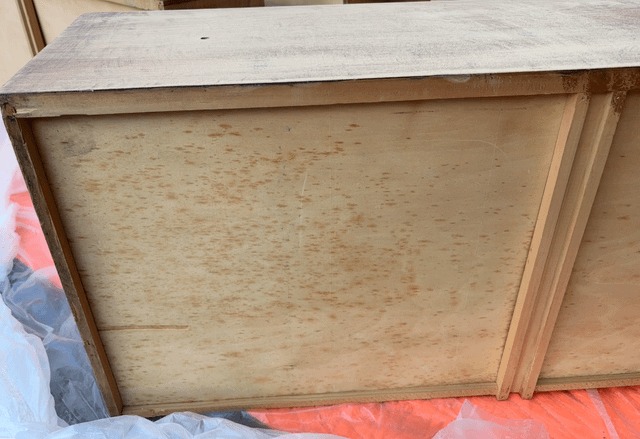
You can usually clean a sound, accessible finish. Swollen or crumbling material is different: the question is whether that part can still do its job once the moisture problem is fixed.
A laminate face can look intact while the particleboard under it has swollen or separated. MDF and particleboard are made from wood fibers or particles, and wiping the coating does not restore a damaged core.
| Material or component | Clean it if | Repair or get help if |
|---|---|---|
| Sealed laminate or painted hard finish | The patch is small and reachable, the finish is intact, and the substrate is sound and dry | Edges are wet, the finish has separated, or moisture sits under the coating |
| Particleboard or MDF | The finished face is intact and cleanable, with no sign of core damage | It is swollen, crumbling, sagging or delaminating, or it gets wet repeatedly |
| Plywood or solid wood | Growth is superficial on intact finished wood, you can reach it, and the wood has dried | The wood is unfinished or soaked through, has deteriorated, or you suspect deeper growth |
| Removable cabinet-bottom panel | The surface is sound and you can clean it without disturbing hidden growth | The panel has deteriorated and needs replacing |
| Backing, drywall or subfloor | Do not decide on the surface alone if you suspect hidden moisture | Moldy porous material or hidden damage needs a qualified investigation |
| Plastic liner or removable hard container | The item is intact and can be washed and dried | Water trapped under it may have soaked the cabinet base |
The EPA’s basic mold cleanup steps separate cleanable hard surfaces from moldy absorbent materials, which may need disposal. No single rule covers every type of plywood, MDF, veneer or unfinished wood. The condition of the material and the depth of wetting decide it.
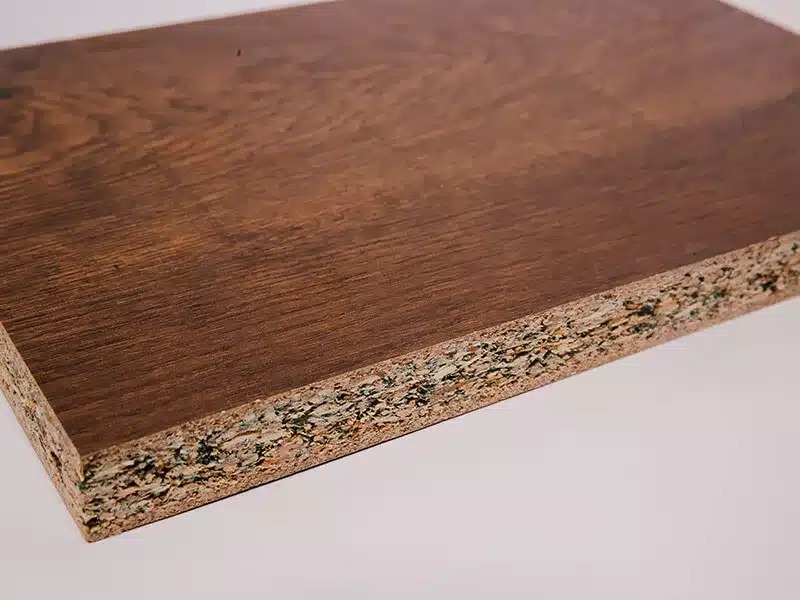
Check exposed edges for softness, peeling, sagging or loss of firmness. The toe-kick, the recessed area below the cabinet front, can hide damage too.
A new liner or coat of paint can hide a wet substrate, so skip both until the leak is fixed and you know the condition of the material.
Clean a Small, Reachable Patch Safely

For a small patch on an accessible hard surface, the EPA recommends detergent and water. Do this only after you have controlled the water source and the material has passed the checks above.
The CDC recommends at least a NIOSH-approved N95 respirator, protective gloves, and goggles that keep mold particles out of your eyes.
- Prepare yourself and the area. Wear the protective gear and use a cleaner that suits the finish. Follow its label and ventilate the space.
- Remove visible growth. Scrub the hard surface with detergent and water without disturbing the surrounding material.
- Dry the surface completely. Leave the area open until it is dry, before you put belongings back or cover the base.
The EPA does not routinely recommend bleach for mold cleanup. The CDC’s household cleanup guidance allows it, at no more than one cup of household bleach per gallon of water. Never mix bleach with ammonia or other cleaners.
Dead mold can still cause allergic reactions, so you have to remove the growth physically. Do not paint, caulk or seal over active growth. A deteriorating absorbent core needs its own repair.
Check for Hidden Water Beneath and Behind the Cabinet

The cabinet floor can look dry while water sits under a liner, at a pipe opening, behind the back panel, or along the wall and floor. Moisture travels before it collects somewhere harder to see.
Check accessible edges, the underside of removable liners, exposed wall penetrations and the area around the toe-kick. Softness, unexplained staining or a persistent musty odor justify a closer look. An odor alone does not prove hidden mold.
Do not cut, drill, sand or peel open suspected contaminated building materials just to see what is behind them. If that is the only way to learn more, arrange a qualified assessment.
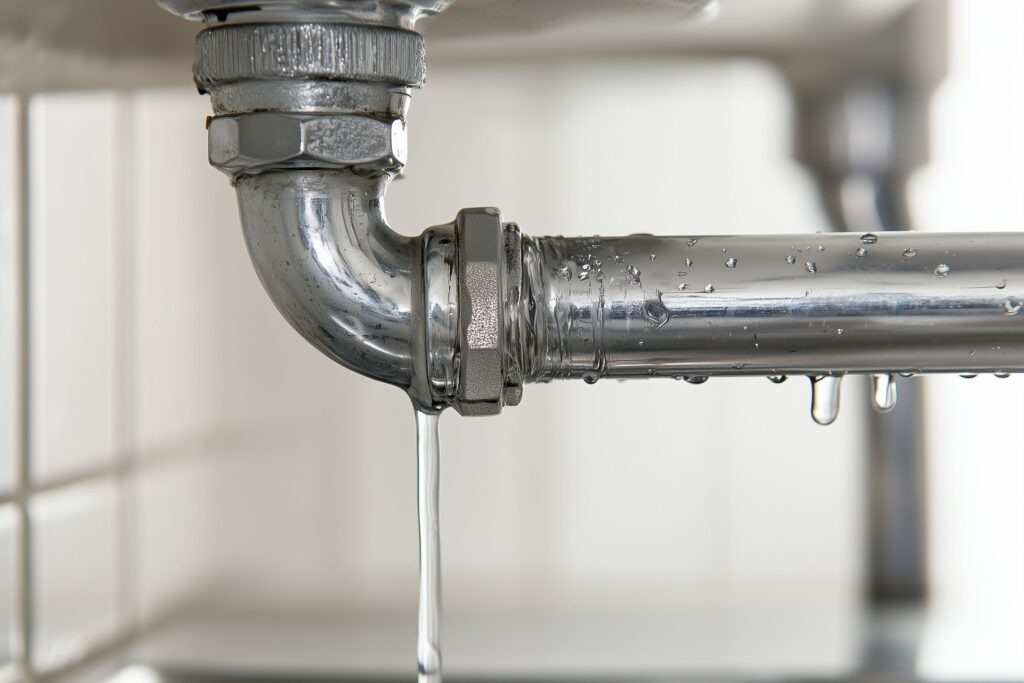
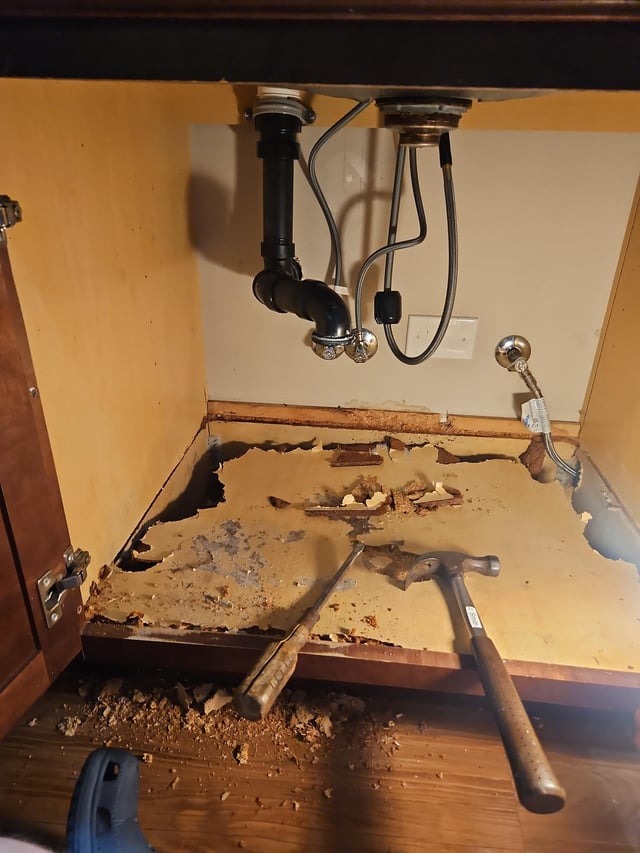
I am in US- NE Ohio. This is a fairly new leak under our kitchen sink (notice the drip at the bottom of the valve). These boards were already replaced about 8 months ago after fixing a leaky P Trap.
I found this leak a month or two ago while installing my dishwasher. My dad tightened it up, but apparently it was unsuccessful. The boards were wet, but there were no signs of mold at that time. I just found this today when I pulled my tool box from under the sink.
I sprayed Mold Armor on it for now, but I know this isn’t even a temporary fix. I assume I need to replace the affected wood, but will this require further remediation?
I appreciate any advice. I have small children and I’m learning homeownership the hard way, so please be kind 🙏💜
Wood replaced eight months ago can get wet again, so check the newer board too.
Handle Stored Belongings and Rental Repairs
A damp cardboard carton, a washable plastic caddy and an intact sealed cleaning-product bottle each need different handling. Separate anything damp or visibly contaminated. Clean and dry hard items. Throw out soaked cardboard, paper and other porous items, or check with a specialist first. Keep belongings out of the cabinet while it is damp.
If you rent, document where the leak is, the visible damage and the dates, then tell the landlord or property manager promptly. Repair duties, notice procedures and liability depend on your jurisdiction and lease.
Prove the Fix Worked Before Closing the Cabinet
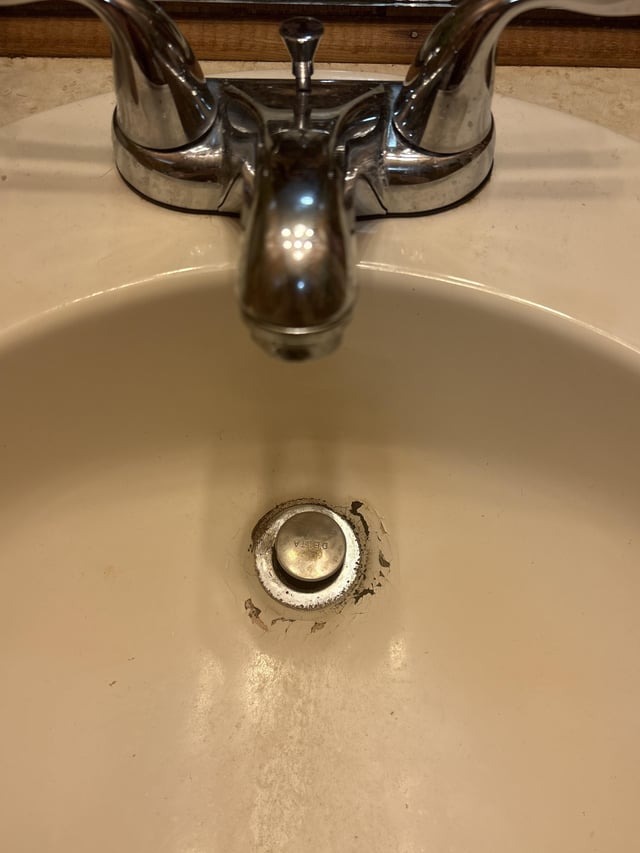
Run the water only when the repair is finished and the fixture is safe to use.
Here are the before and after photos of my kitchen sink. I’ve had a leak with this sink before but it was the drainage pipe that cracked open and drained into my basement wall. This time around one of the nuts on the pipes were loose and it was leaking for a while. I figured out something was wrong when I started seeing black stuff on my dishwasher detergent box.
I wiped out most of the sludge, then scrubbed it down and dried what I could with paper towels. I soaked it with mold killer and let it sit for a day before scrubbing again and doing a final round of mold killer. Then I let it dry for a couole weeks.
Before all this I had thought I fixed the leak. But during the drying stage I put in a moisture detector and later that day it alerted me that I didn’t fix the leak. It ends up there was a second loose fitting that needed to be fixed.
TL;DR got a leak, fixed it, ends up I didn’t, moisture sensor saved my bacon. Don’t be me and get water sensors!
A moisture sensor can back up your visual checks.
- Repeat what made it leak. Run the repaired supply, faucet, drain, disposal or dishwasher connection again.
- Look for fresh moisture. Watch dry paper or a moisture detector during use, and over the following days if the problem was intermittent.
- Confirm the cabinet is dry. Exposed material should be dry, visible growth removed, and damaged parts repaired or replaced.
- Recheck after normal use. If water, visible growth or a musty odor returns, trace the source again and look for hidden damaged material.